How to Disable Startup Programs in Windows

How to Disable Startup Programs in Windows: Boost Your PC’s Performance
Managing startup programs in Windows is essential for improving system performance. Startup programs are applications that automatically launch when you boot up your computer. While some are necessary, others can slow down your system. In this guide, we’ll show you how to disable startup programs in Windows to speed up your PC.
Why Should You Disable Startup Programs?
Disabling unnecessary startup programs can significantly improve your system’s boot time and overall performance. Programs that run in the background use up memory and processing power, which can cause your computer to become sluggish. By managing these programs, you free up resources for more critical tasks.
How to Disable Startup Programs in Windows 10 and 11
Follow these steps to disable startup programs in both Windows 10 and Windows 11:
1. Open Task Manager
- Right-click on the taskbar and select Task Manager, or press
Ctrl + Shift + Escto open it. - Click on the Startup tab to view the list of programs that run when Windows starts.
2. Disable Unnecessary Programs
- Under the Startup tab, you’ll see a list of programs, along with their status (Enabled or Disabled) and the impact they have on your startup time.
- To disable a program, right-click on it and select Disable.
- You can sort the list by Startup impact to prioritize which programs to disable. Programs marked as High have the most significant impact on your system’s startup time.
3. Restart Your Computer
After disabling unnecessary programs, restart your computer to see the performance improvement.
Alternative Method: Using the Settings App in Windows 11
In Windows 11, you can also manage startup programs through the Settings app:
- Open Settings by pressing
Windows + I. - Navigate to Apps > Startup.
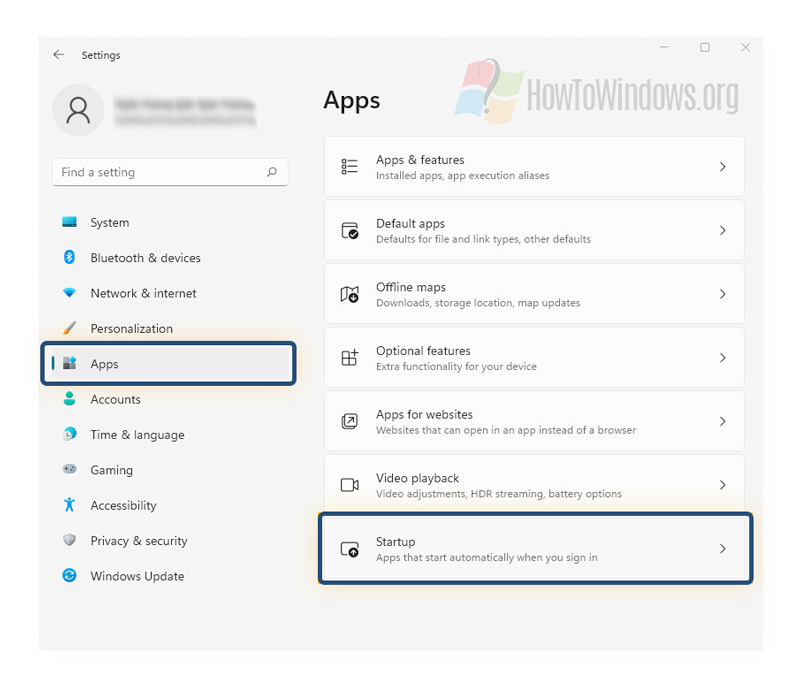
- Toggle off the programs you don’t want to start automatically.
How to Disable Startup Programs in Windows 7
For those using Windows 7, the process is slightly different:
- Press
Windows + R, type msconfig, and press Enter. - In the System Configuration window, go to the Startup tab.
- Uncheck the boxes next to the programs you want to disable.
- Click OK and restart your computer.
Which Startup Programs Should You Disable?
Not all programs should be disabled. It’s important to leave essential programs, such as antivirus software, enabled. Common non-essential startup programs include:
- Media players
- Cloud storage apps (e.g., Dropbox, OneDrive)
- Messaging apps (e.g., Skype, Slack, Telegram)
- Game launchers (e.g., Steam, Epicgames)
Learning how to disable startup programs in Windows is a simple yet effective way to improve your computer’s performance. By following the steps outlined in this guide, you can speed up your system’s startup time and free up valuable resources. Regularly checking your startup programs ensures your PC runs efficiently over time.


